Ultimate Guide to Natural Hamster Enclosures: Creating a Beautiful and Healthy Home
Hamsters may be tiny, but I’ve learned they thrive best in a space that feels big, beautiful, and most importantly—natural. When I first ditched the colorful plastic tubes and cages for a more earthy setup, not only did my hamster love it, but my room looked so much better too.
So if you’re dreaming of a cozy space that’s both hamster-friendly and easy on the eyes, you’re in the right place. Let me walk you through everything I’ve discovered about building a natural hamster enclosure. From cage types and bedding to plants and décor—this guide is packed with tips that work.
Choosing the Right Hamster Enclosure
First things first: your hamster needs plenty of space to thrive.
- Minimum size: For Syrian hamsters, go for at least 6,000 cm² (around 930 square inches). For dwarf hamsters, try not to go below 5,000 cm² (775 square inches).
My Favorite Enclosure Types:
- Glass Aquariums – I love how sleek they look! They’re escape-proof and easy to decorate naturally. Just add a mesh lid for airflow.
- DIY Bin Cages – If you’re on a budget, this option is a winner. I made my first one using a storage bin and a mesh lid.
- Wooden Enclosures – Beautiful for a natural look. Just make sure the wood is sealed and pet-safe to avoid odors.
When I upgraded to a 40-gallon glass tank, my hamster started tunneling nonstop and seemed so much more confident. I honestly wish I’d made the change sooner.
Bedding That Encourages Natural Burrowing
Hamsters are natural diggers, so the right bedding—and the right amount of it—is key.
- Depth tip: I aim for 10 to 12 inches. You could do 6 as a minimum, but deeper is always better.
Bedding Mix I Use:
- Paper-Based Bedding – Soft, absorbent, and perfect for the top layer.
- Hemp Bedding – This keeps tunnels stable and is low in dust.
- Aspen Shavings – Great as a base, but I always mix it with softer material.
- Coconut Soil or Fiber – Adds texture and feels more natural. Just make sure it’s chemical-free.
My hamster builds elaborate tunnels when I combine these layers—and she pops up in the funniest spots!
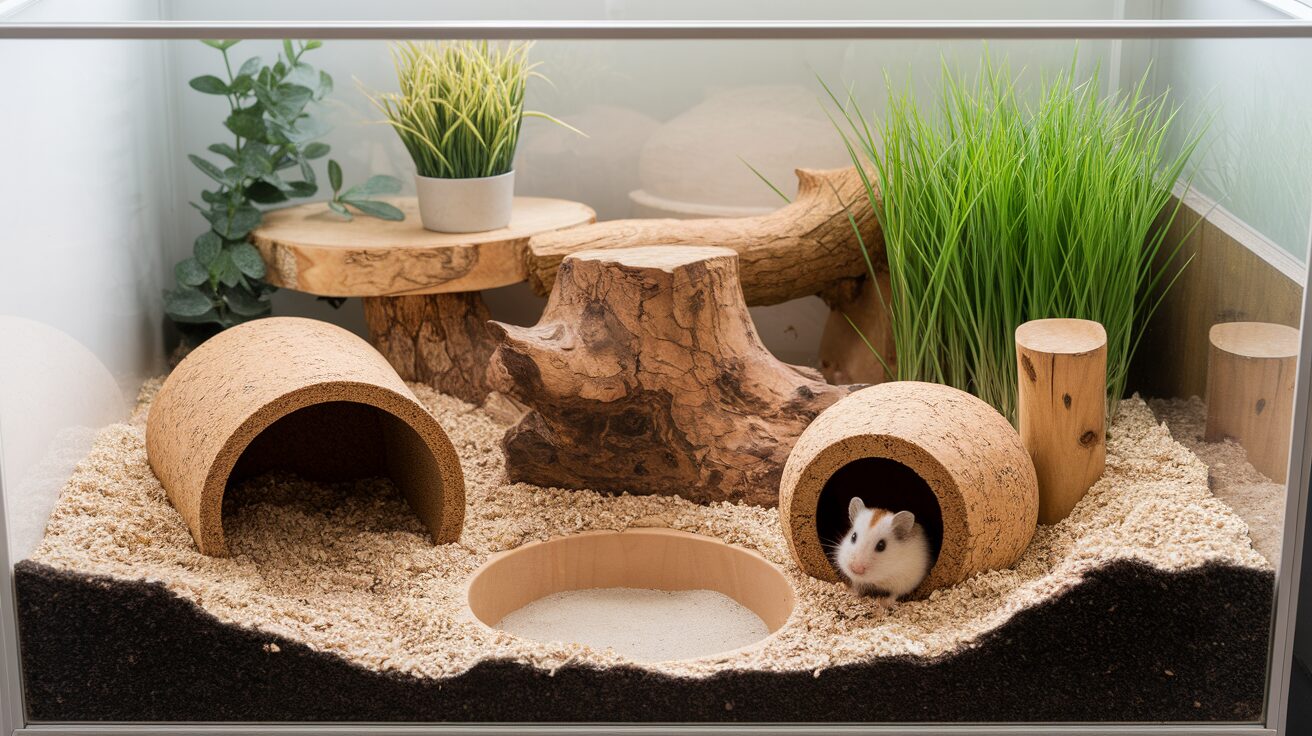
Natural Décor & Enrichment: Make It a Tiny Jungle
This part is so fun—it’s where I bring the outdoors in.
Cozy Hideouts
- Cork Logs – Light, chewable, and organic-looking.
- Terracotta Pots – Cool to the touch and make for great napping spots.
- Wooden Houses – Make sure they’re untreated and safe. I skip cedar and pine.
For Climbing & Exploring
- Branches – I clean and bake apple or willow sticks before adding them.
- Platforms – These are awesome for creating vertical space. I make mine out of scrap wood.
Foraging Ideas
- Seed Sprays – Like flax and millet. I hang them from branches—instant playground.
- Dried Flowers & Herbs – Chamomile and calendula are my go-tos. They look good and smell amazing.
One of my favorite tricks? Stuffing a toilet paper roll with bedding and hiding treats inside. Watching her go at it is pure joy.
Adding Safe, Edible Plants
Live plants can make the setup pop and give your hamster something safe to nibble.
Plants I’ve Used:
- Spider Plant – Hardy and non-toxic.
- Wheatgrass – My hamster LOVES this one.
- Parsley & Basil – Easy to grow and safe in small amounts.
How I Keep Them Safe:
- I only use pesticide-free plants.
- I skip fertilizers and use clean, pet-safe soil.
- I place the pots up on platforms or behind hides so they’re not completely torn up.
Start with one or two and see how your hamster reacts. I quickly learned mine prefers wheatgrass over parsley.
Sand Baths: Because Baths Aren’t for Everyone
Hamsters don’t like water—but they LOVE sand.
Safe Sands:
- Reptile Sand – Dust-free and my personal favorite.
- Baked Play Sand – Just bake it first to kill bacteria.
How I Set It Up:
- I use a glass baking dish tucked into a corner. Some folks use ceramic bowls or wood trays.
My hamster rolls and digs in hers every single day. It’s super cute and keeps her coat healthy.
Keep It Comfortable: Light, Air, and Temperature
Lighting and temperature affect how your hamster sleeps and plays.
- Lighting: I keep her enclosure in a room with natural daylight—but never in direct sun.
- Temp Range: Between 68°F and 75°F (20°C to 24°C) is perfect.
- Avoid Drafts: No placing cages by windows or AC vents.
If I feel chilly in a hoodie, I know it’s too cold for her too.
Make It Beautiful: Simple Aesthetic Tips
You can create a space that feels calm and natural and looks good on your feed.
- Use Earthy Tones – Beige, forest green, and natural wood all blend beautifully.
- Play with Texture – Combine soft bedding with smooth stones and wood hides.
- Design With Depth – Ledges, tunnels, and platforms make it more fun to explore.
- Hide Functional Items – I place the water bottle behind a cork tunnel and food dishes inside a wooden nook.
I even added battery-operated fairy lights outside the glass. Instant cozy.
Be Safe, Not Sorry: What to Avoid
Not everything “natural” is actually safe for hamsters.
Hard No’s:
- Toxic Plants – Like ivy, aloe, or lily.
- Cedar & Pine – Strong oils can irritate their lungs.
- Sharp Decor – Anything splintery or jagged is a risk.
- Plastic Decor – If it’s chewable, it’s potentially dangerous.
How I Keep It Clean:
- I spot-clean every other day.
- I change out the bedding completely every 4 to 6 weeks.
- I rinse and dry décor in the sun once a month.
Bonus: I keep a flat stone in the cage to help file her nails naturally. Less trimming for me!
Real-Life Layouts I Love
1. Burrow Paradise
- 12″ bedding base
- Minimal décor on the surface
- Encourages deep digging
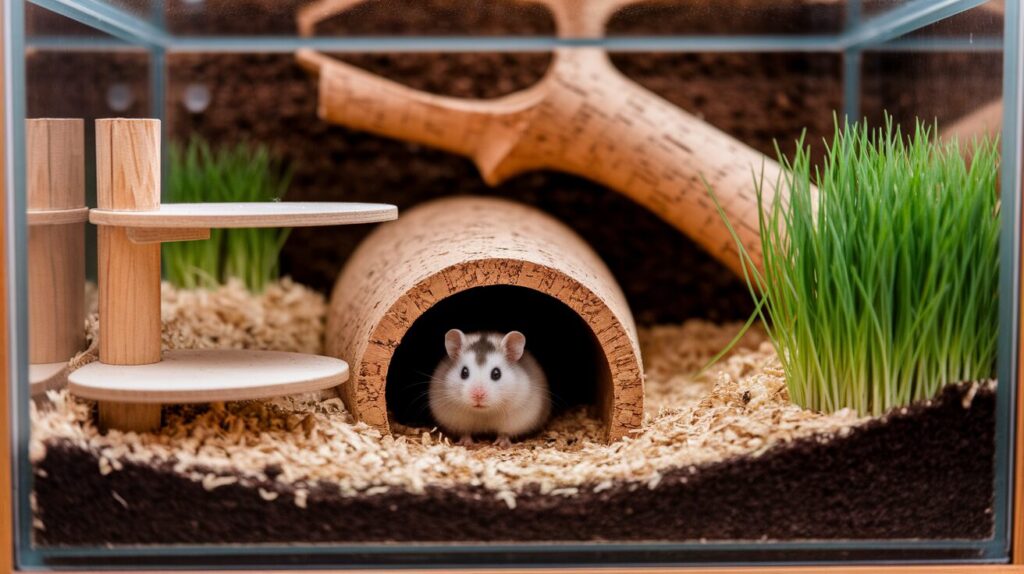
2. Jungle Explorer
- Wooden levels and branches
- Hanging sprays and tunnels
- Ideal for active hamsters
3. Terrarium Vibes
- Glass tank setup
- Potted greens and neutral tones
- Simple and serene
My hamster is definitely a burrower, so we’re currently all-in on the Burrow Paradise theme.
Your Questions—Answered!
Can I use moss or grass from outside?
If it’s clean and untreated, sure! But always sanitize anything from outdoors.
What size enclosure should I get?
As big as you can! You’ll never regret more space.
How do I clean without disturbing the setup?
Use sand in a corner as a potty. That’s 90% of the mess.
Is homemade décor safe?
Yes, if it’s made from hamster-safe materials and has no sharp parts.
Final Thoughts
Creating a natural hamster enclosure is more than a hobby—it’s a way to give your little buddy a better life.
Every burrow, hideout, and plant you add gives your hamster a chance to live more like they would in the wild. And let’s be honest—it’s so rewarding to watch them explore the space you created.
Start simple. Add on. Observe. Tweak. You’ll end up with a gorgeous setup and one very happy hamster.
📌 Pin this guide so you can come back anytime while building your dream enclosure!